In need of a harbor…

It was a gray-ish, kind of dreary day in Atlanta. We seem to be stuck in the space between what we southerners think of as fall and winter. I’m still trying to adjust to the early sunsets. And the news.

Oddly enough, I’m also humming Jimmy Buffett tunes in my head and dreaming of Key Lime Pie!

I suspect it has to do with our preparations for a voyage to the Conch Republic.

We are, perhaps, a bit behind in terms of shore excursions and ground logistics, but we’re excited.

An actual chance to put my toes on Key West (without dealing with the infamous bridge) and a whole week with my favorite people.

So, in honor of that…my go-to recipe for Authentic Key Lime Pie, complete with my fabulous gluten-free oatmeal pie shell, just in case you might be feeling the need for a harbor like I am just now!

Authentic Key Lime Pie

MAKES: ONE 9 INCH PIE, ABOUT 8 SERVINGS

The real deal Key Lime Pie, right here. Better yet, with the Oatmeal Pie Crust shell, it’s gluten-free! This is the recipe right off the Nellie & Joe’s bottle of Key West Lime juice. You can order it from Amazon or try Whole Foods or Publix depending on where you are. Did you know that the pie has sweetened condensed milk in it because the recipe was developed before Key West had dependable milk delivery or refrigeration? Really! Would I eat this once a week? No, but it’s a holiday favorite in my family. Remember, if it’s green, it’s not real Key Lime Pie!

Equipment Note: You can use a food processor, hand or stand mixer for this, but a wire whisk will do it. A mixing advantage is handy if you opt for homemade whipped cream. I often use an Eco-foil disposable pie tin with the domed plastic crust when I make this pie.

Arrange oven racks so pie will bake in center of oven.

Preheat oven to 350°F.

In a suitable mixing bowl, combine and mix well:

One 14-oz. can sweetened condensed milk.

3 good quality egg yolks. (Reserve whites for another use.)

Add and blend until smooth:

½ c. Nellie & Joe’s Key West Lime Juice.

Pour filling into:

One miraculous 9-inch Oatmeal Pie Crust (see below) or a prepared graham cracker pie shell.

Bake for 15 min. Remove from oven and place on cooling rack. Allow to sit 10 min. before refrigerating.

Chill several hours or overnight.

Optional: Add to sparkling clean mixing bowl, preferably metal,

1 pint organic, heavy whipping cream

1 Tbsp. 10x powdered sugar, if desired. (I like mine unsweetened.)

Whip cream rapidly by hand or with mixer, until soft peaks form.

If not using immediately, cover with plastic wrap and refrigerate.

Just before serving, top pie with whipped cream.

Oatmeal Pie Crust

I found this on an old, yellowed index card, in my mom’s handwriting, when I went through her recipes. I don’t remember her ever making it. What a gift for Bill, who’s gluten-free! See how many ways you can find to use this like you would use a graham cracker crust, but better!

Equipment Note: A food processor or Vitamix-type blender is used for this recipe.

Depending on how high your pie will get when finished, allowing for whipped cream or meringue, you may want to purchase an Eco-foil pie pan with a plastic cover.

Into the bowl of your food processor or carafe of your blender, place:

1 c. gluten-free rolled oats.

½ c. brown sugar.

½ c. flaked or shredded coconut.

Pulse until ingredients resemble a fairly fine meal. Add:

⅓ c. melted butter OR – 1/3 c. melted coconut oil

Continue to pulse until all ingredients are evenly mixed.

Press into bottom and sides of a 9 inch pie plate. Cover with plastic wrap or lid to the pan. Chill.

And a special hint for you, friends…this pie is great for breakfast, with a cup of dark roast coffee and some of your delicious whipped cream. An actual beach is optional, but quite nice!


What brunch looks like when all the turkey bones are in the stock pot!

There ain’t a body – be it a mouse or a man – that ain’t made better by a little soup.                                          

                                                                  – Kate DiCamillo                                                                   

Turkey Broth…the actual magic, right here!

Makes: 6 – 8 quarts in a 10 – 12 quart stockpot.

Notes: Consider making a big pot of turkey broth as part of a holiday tradition. It’s a great way to teach the next generations and it smells heavenly. 

I like a very clear turkey broth with a lot of depth that can be used in any number of recipes, so this is what I do. If you have a specific flavor profile in mind, feel free to adjust the herbs and veg as you like. Please resist the temptation to toss all the wilted stuff in your fridge into the pot!

Ingredients: The best stock contains a mixture of roasted and raw bones. Choose yours from the list below.

  • Carcass from ½ a roasted turkey, including some ribs and a wing, with some meat still attached. A leg is also useful if you have one left. Smoked turkey bones will work, too! If you just roasted a turkey breast, use those bones and add bones from a couple of roasted chickens.
  • Any necks, hearts, or gizzards you’ve saved. (Freeze livers separately for dirty rice, etc.)
  • Additional raw bones, about 1-2 lb. necks, backs, wings, etc. (You can use chicken bones, too, if you like.) I particularly like necks for this because they have lots of healing cartilage. Check your local farmer or an international market near you.
  • 3 Tbsp. acidic liquid. I use Braggs Organic Apple Cider Vinegar “with the mother.” White wine or fresh lemon juice will work, too.
  • 3-4 med or large yellow onions, halved, with skins on. (Really!)
  • 3-4 whole garlic bulbs, halved, with paper on.
  • 3-4 fresh bay leaves or 2-3 dried ones.
  • Fresh thyme sprigs. The more the merrier! I use a bundle about the diameter of a quarter, tied with white cotton kitchen string. Add a 4-6 inch sprig of fresh rosemary if you like.
  • Fresh parsley stems, if you happen to have some around. Tie them with the thyme sprigs. 

Place raw bones with any gizzards or hearts into stockpot. Add cold water to cover by 2-3 inches. Add cider vinegar, white wine, or lemon juice. Cover and allow to sit, off the heat, for about 45 min. This helps pull the minerals and other goodies out of the bones and into the stock.

After you’ve soaked the raw bones, add the roasted bones to the stockpot.

Add additional cold water, leaving room at the top to add your veg and herbs. Place pot over med. high heat and bring to a very gentle boil.

After pot begins to boil gently, adjust temp to keep it from reaching a full, rolling boil. Skim whatever foam or bits of grey-ish stuff float to the surface and discard. You’ll need to skim every few minutes until it quits creating stuff to skim! (About 10-15 min. total.) This step is important! Skimming helps create a beautiful clear broth and prevents the development of any bitter taste.

While you’re skimming every few minutes, prep your veg and herbs as described above. Leaving the skin/paper on onions and garlic adds to the flavor and color of the broth. (Wipe any dirt from onion skins.) This is one reason I like organic! Try not to do this too far ahead. Onions are best used when they’ve just been cut!

Add your prepped veg and herbs gently so as not to splash yourself.

Turn the heat down to med-low. You want your broth to just simmer gently. No more boiling. It will take some practice with your particular stove to find out what works. Fiddle with it and check frequently. You want itty bitty bubbles just breaking the surface.

Cook for at least 8 hours, and not more than 16, for a clean flavor with all the nutrients pulled out into the broth. Try not to stir while it cooks. (That can cloud your broth.) You can put on a lid, partially covering the pot, for part of the cooking time to lessen the amount of water that cooks off, making the broth somewhat less concentrated, or leave the lid off and allow it to reduce more, concentrating the flavors. If you put the lid on, you’ll need the turn the heat down to keep it from coming to a boil. Turn the heat up a bit if you take the lid off. We’re still after those itty bitty bubbles!

If you wish to add additional water during cooking to increase the amount of broth, you must use very hot water, about 180-190 F.

Now is the time when you get to inhale the magic while you throw in a load of laundry and go back to your writing, pick up a paint brush, or teach your kids to play Cribbage…

When you’re happy with the color and flavor of the broth, remove from the heat and allow your marvelous creation to cool an hour or two. Scoop all bones and aromatics from the broth and discard them. (They’ve given all they had!) Remember that you’re going to use this broth to add flavor and nutrients to other recipes. Please resist the urge to add salt or adjust seasonings now.

After scooping out bones and so forth from the pot, strain into another container through a fine mesh sieve, being sure to get all the bones. You may use some of the broth immediately, if you care to. Otherwise, chill broth overnight in the fridge. You’ll know you’ve got a great batch if it gets jiggly, like soft Jell-O! (If not, it’s still a miracle! Just keep practicing.)

Transfer chilled broth to quart- and pint-sized plastic containers, (or the sizes that work for you) preferably BPA free. Leave 1 inch headroom, as broth will expand when frozen. Label, including date, and freeze until needed, up to 6 months. I try to thaw frozen broth overnight in the fridge before using. When that isn’t possible, thaw on counter and monitor so that it doesn’t start to warm.

Let the magic begin again!


A dog’s perspective on Thanksgiving!

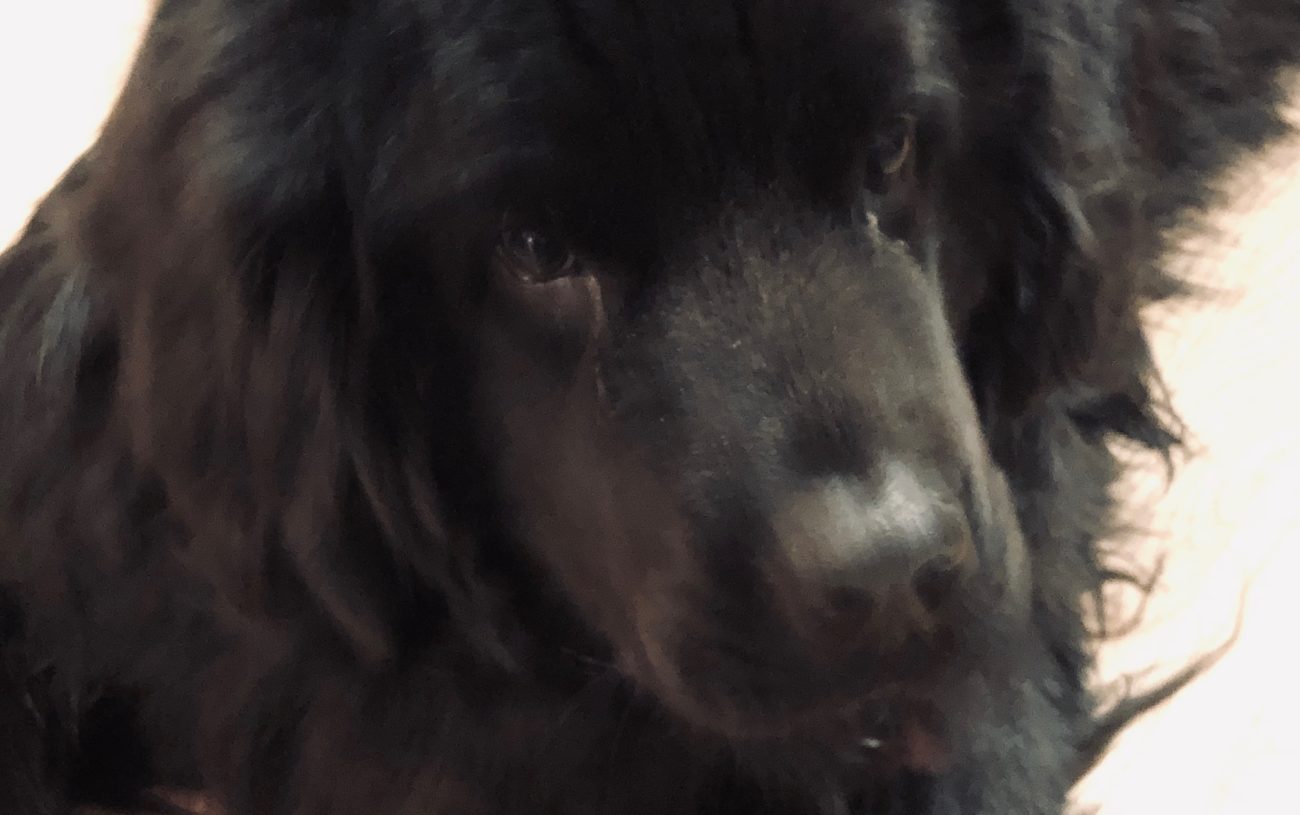
Today it’s my turn to blog…I’m Phoebe!

I’ve been here just about a year now and, even though I’m all settled in, things keep surprising me.

Like Thanksgiving, which is, apparently, one of the days called “holidays”.

Last year Sarah and I went to Camp for Thanksgiving while Mom and Dad went to hang out with our girls.

We had lots of fun at Camp. Then we came home and slept for a couple of days like we always do. That much fun makes us tired!

This year, though, we’re all home together. Luther, too, of course.

Mom and Dad believe in being flexible about when holidays happen. Here’s what I’ve learned so far:

Sarah and Luther and I had our Thanksgiving on Tuesday. The big dogs had turkey wings which seem to be a Thanksgiving thing. I had duck wings which are really yummy and easier for me to chew. We had kale stems and salmon oil, too. It was really good. I think I like Thanksgiving!

Mom and Dad had Thanksgiving today, which is Wednesday. (I think most people do that on Thursday.) Dad is home this week and he wanted more days to eat turkey so they just decided to do things differently. It smelled really good!

Mom says it doesn’t matter when you have Thanksgiving. It just matters that you’re together and say “Thank you” and remember that there are people — and dogs — who don’t have as much as you do.

I understand that!

Before I lived here I was chained to a fence in the sun with no food and no water. I tried to chew through the chain and kind of messed up my teeth, which I think is why sometimes I get different bones than the big dogs do.

Luther and Sarah didn’t have what they needed before they lived here, either. Mom says we can help local businesses and our farmer friends have what they need when we choose our food. I like our food friends!

I don’t really understand why, but Mom says there are also people who don’t have enough to eat. And lots who don’t have clean water. And something called healthcare, which I think is like when our Auntie Karen comes to visit.

That makes Mom sad. Sometimes it makes her mad, too. She types really hard some days. And calls people on the phone. Yesterday I heard her say that we’ll all be safer if everyone has enough.

I’m just a dog, but I agree with that. It’s hard not to get mad, or mean, when you don’t have enough and others have too much.

Here are some more things I learned about Thanksgiving this year…

There were lots and lots of things that smelled green in our fridge. You know, like leaves. Mom says that’s a new/old Thanksgiving tradition.

The turkey came from our friend, Greg.

And Mom says we’re giving away half the soup that comes from the bones.

I think, maybe, other families do Thanksgiving differently. Mom says different is ok. It sounds to me, though, like the point of the whole thing is to remember the good things and try to share them with others.

Mom has a friend we haven’t met whose name is Rumi. A long time ago, even before Pilgrims, I think, he said:

There are hundreds of ways to kneel and kiss the ground.

Maybe Thanksgiving is about each of us finding our own way.

From all of us to all of you, Happy Thanksgiving! And thank you for listening. I like blogging! Love, Phoebe

PS – Mom’s going to share her recipe for turkey broth on Sunday. Save those bones! (And, please, please, please don’t give cooked bones to your dogs!!!)


And a smidge more heresy…

Welcome! Now that I’ve confessed that I don’t do turkey the way my granny did, it’s time to move on from dry brining (There’s still time!)  to the part that smells so good. Actual roasting!

Of course, you’ll need your bird thawed, even if you skipped the dry brining process. (Note: It can take up to 3 days to thaw an 18-20 pound turkey in the fridge!) For Gorgeous Juicy Turkey, you’ll want to plan on roughly 2 hours for roasting and 1/2 hour for resting. See * below for additional info on timing according to turkey size!

A small amount of math is inevitable.

Remove your lovely bird from the fridge about 4 hours before you’re planning to serve your fabulous dinner. Allow it to sit out and come to cool room temp…about an hour. Put it somewhere the dogs really can’t reach it!

Preheat oven to 525 degrees F. 

Pour out any juices from the inside of the turkey and the bottom of the pan and discard. Pat the bird gently dry, inside and out, trying not to disturb any remaining brine mixture on the skin.

If you brined, no additional salt or pepper is needed!

(If you didn’t brine ahead of time, remove any innards, etc. now and generously season the inside of the turkey with good sea salt and freshly ground black or mixed peppercorns. )

Your marvelous dressing goes into a pan to bake. Trust me. (Sorry Granny!)

Fill the cavity with aromatics. Try a mix of your favorites… any combination of these will add to the cooking juices, keeping the turkey moist and making tasty gravy. (This part will take about 1/2 hour of our 4 hour timeline.)

  • Quartered onion, skin on.
  • A whole garlic bulb, cut in half.
  • A quartered, cored, firm organic apple.
  • 3-4 bay leaves, preferably fresh, crushed briefly to release oils.
  • A handful of fresh thyme sprigs. 
  • A fresh lemon, cut in half.
  • Rosemary and sage are good too, but may overtake other flavors. Tread lightly!
  • Any stems from fresh parsley you may have around.

After the cavity is filled, tie the wings and legs, pulling them close to the body with kitchen string so your bird will roast more evenly.

Then, scrub and roughly chop about:

  • 6 small carrots.
  • 3 – 4 onions.
  • 6 ribs of organic celery, including some leaves if desired.

Place chopped veg in your roasting pan, forming a “rack” for the turkey. Place trussed bird, breast side up, on the veg.

Put in 525 degree oven for 11 minutes. Reduce oven temp to 400 degrees and continue to roast. 

(Any yummy veggies you’re roasting for dinner will do well at the same 400 F.)

Baste turkey every 20 minutes or so with good olive oil (or melted, unsalted butter), using a small brush.

* Alice Waters says to figure about 12 minutes per pound for a 15-pound, unstuffed turkey and fewer  minutes/pound for larger birds. If you’re roasting our mythical 18-20 pound bird, start checking temp about 1 hour 45 min. after you reduced the oven to 400 F. by inserting an instant read thermometer into the deepest part of the breast, making sure tip does not touch the bone. Check the plump part of the inner thigh the same way. As amazing as this sounds, my 18-pound birds are brown, sexy, and beautifully done 2 hours after I turn the oven down to 400 degrees! Cook to 160 degrees F. on your thermometer.

If you jiggle the ends of the legs, they will move freely and whatever juice comes out when you take out the thermometer will be clear. Remove your gorgeous bird to a deep platter or cutting board with grooves for the juice and allow it to rest for 30 minutes. If you like crispy skin, leave it uncovered!

Remove the string. Carve your masterpiece as desired, adding the juices to your gravy.

Gather your family and friends and enjoy.


What are you going to be?

Frost season has arrived in Atlanta. The deck is really cold. And, at our house, Charlie Brown and his pumpkin patch friends are hoping against hope to actually make it out of the basement for the festivities this year.

The freezer is well stocked with fabulous butternut squash soup.

And one of the superstore chains is oh, so happy to remind you that you can get same day pick up on costumes.

Clearly, it’s almost Halloween.

Just between us, this particular holiday has never been one of my personal favorites.

It’s grown on me some since my girls came along and there are trick or treat bags to sew and pictures to look forward to, each year more amazing than the last.

The thing that most surprises me, though, is all the people wondering what I’m going to “be” for Halloween.

Here’s the scoop:

I’m going to be a grandmother!

(Not more babies. Just more awareness.)

My “sparkly silver” hair is all set. And a bit wild-looking in a maybe growing out kind of way these days!

All I need is my favorite peachy-orange Oxford cloth shirt covered, as it usually is, with quilt threads and dog hair. Paint spatters are not out of the question.

Black leggings.

And, who knows? If it really gets chilly I might even bust out the magical ruby slippers that followed me home from Portland in June.

The whole “costume” question seems to be almost an obsession in our world.

What are we going to “be” in our lives? And how will we communicate that to others? Especially the little ones who are watching us?

It used to be easier for me.

Back in the day, nurses and pastors had pretty specific “costumes” for going about their business. At least it seemed so at the time. Though it got a bit more complicated if you happened to be a “girl” pastor in the south.

For a while, even before Steve Jobs, I flirted with the “uniform” theory. You know. One less thing to think about.

Inevitably, though, I busted out of the box and wound up with a bunch of random “fun” things that never seemed to solve the what-to-wear problem.

Eventually, I read a book that suggested starting to plan a wardrobe with adjectives rather than color swatches.

A concept I understood!

Three descriptive words for what you hope to “say” with a wardrobe.

(Go ahead. I’ll wait.)

The thing that continues to wonder me about the three words I chose, close to 15 years ago, is that they still work for me!

Not that my wardrobe choices are still the same. Or my life, for that matter. But the message still feels true.

Now, just between us, I’ve tried hard to figure out how to tell this story without actually telling you the words I picked. It feels really personal.

It seems, though, that there’s no way around it. Your words will no doubt be different. (That’s the way it’s supposed to work.) Mine were/are:

Wise, Creative, and Refined

Let’s start with a bit of reality! When you live with three Newfoundland dogs,  actually looking refined is, at best, a special occasion option.

These days, the meaning that particular adjective has for me falls somewhere between the William Morris notion I mentioned recently of having nothing we do not know to be useful or believe to be beautiful and moves on to the old quote by Coco Chanel about getting all dressed and accessorized, then removing one piece.

Both of these ideas inspire me.

Wise and Creative have some more practical applications.

At this point in my journey, Wise reminds me of safe, organic, natural fabrics. Almost nothing that needs to be dry cleaned. Layers of all-season garments. As few shoes as possible.

Creative is all about flexibility and color and imagination, with a few quirky accessories.

I’m loving the environmentally friendly, colorful, decidedly quirky clothes from Gudrun Sjoden these days. It’s like Garanimals for grandmothers!

And, of course, a red thread around my wrist.

This year, I’m going to be me for Halloween.

How about you?


“I love to go a-wandering…”

I spent a recent morning in the Decatur post office.

You’ll have a better grasp of what a big deal this was when I explain that I’d do just about anything to avoid going to the post office. Bill will confirm that fact.

This, however, was a special mission.

I needed to renew my passport which is a bit ironic for a woman who, for a lot of boring logistical reasons, needs to negotiate dog-sitter time for a quick trip to the Farmers Market.

But, let’s back up just a bit.

I hate paperwork. I hate government forms. I’m none too fond of having my picture taken.

So why did I find myself leaning against the wall, waiting for the door to the passport kingdom to open at 9:15 on a Thursday morning?

I love my kids!

And this year, we’re going on a cruise for Christmas.

I can’t wait!  And yet, complications abound.

First, there are the usual sort.

When is school out? Who has to work when? Which choices are–shall we say–better investments?

Then there are the somewhat more complicated sort. Names. Birth certificates. Social Security cards. Not numbers. Just cards.

Then there are the really cosmic sort. You see, we made these plans just before the 2017 onslaught of hurricanes started.

It’s entirely possible that we’re getting on a boat headed for several places that aren’t there anymore.

On the one hand, it’s no big deal. I’ll happily float around and teach the girls to play Cribbage.

On the other hand, it’s a huge deal for the world.

I have friends in South Florida. And Puerto Rico. And the Dominican Republic.

Friends who are thrilled that, even though they lost all their stuff, their houses are still standing. And friends who are less thrilled.

Friends who are still wondering when they will have power and clean water.

I also have friends who don’t have the luxury of being able to plunk down some papers from the file cabinet so they can go where they want to be.

And a whole bunch more friends who are trying, with every fiber of their beings, to figure out what you and I can do about all of that.

There don’t seem to be any easy answers.

In fact, the best thing I’ve got is to hang out with people asking the same questions.

Here’s where my list starts:

More experience. Less stuff.

Getting out of our personal safe spaces and meeting people from other places.

Hearing the stories those people need to tell.

Voting for people who realize that climate change is important and urgent and real.

So, a couple of months from now, I’m getting on a boat with the people I love the most, and a whole bunch more I’ve never met.

Pens and paper and cameras will no doubt be involved.

So will some conversations about blessings. And how to share them.

I don’t know what will change in our lives because of this trip, but I’m pretty sure we’ll learn some things we don’t know now.

Sure enough to show up at the Decatur post office at 9:15 in the morning and sign papers, swear oaths, and write a very official check, all to make the cruise, which may be going to nowhere, a possibility.

I’m betting my girls and I will learn something.

Maybe Cribbage!

Also, I suspect, that the world is both huge and very, very close by.


I used to bake bread.

Really, I did!

Delicious, perfectly textured, yeasty, golden brown bread in gorgeous pottery loaf pans, scenting the house with a hint of heaven.

I loved the process.

Planning. Checking the pantry. Checking the calendar. Doing the math on mealtime.

I loved the mixing. Measuring just so, even though that’s not my usual thing. Everything in just the right order. (It matters!)

A bit of help with the kneading from the magical mixer. My shoulder singing its gratitude.

Mostly, I loved what came next.

Rising.

Helped out, according to the season, with a light bulb or an ever so slightly warmed oven.

Alchemy in my kitchen!

Then, what bakers refer to as punching down, which always struck me as a bit more assertive than necessary. The heel of one hand pressed into the puffy dough, deflating it before my eyes.

And then, hand kneading. Just a bit, with a smidge of leftover flour, silky, elastic dough on the way to loaf pans for more rising.

Baking, next of course. Fragrant. Comforting. And the torture of cooling.

Actual eating, almost (but not quite!) anti-climactic after a day of music for all the senses.

Take. Eat. Ritual as much as anything.

I used to bake bread.

And how my grandmother used to bake 40 loaves a week on a wood stove will remain a cosmic mystery for me!

Now, though, I am in a season apart from eating bread. (And pasta and most grains. Except for a bit of rice with really good sushi now and then.)

It’s not that I no longer appreciate them.

It’s just that I feel a lot better when I don’t eat them. I’m more mobile. Less limited.

These are great things!

Greater, perhaps, than actually eating the bread.

Oddly, the baking of the bread is still with me, even though only in my memory just now. In some unexpected way, I am changed by the bread I have baked.

By a commitment to the best ingredients I could get.

By finding time for an art form.

By rolling around in the process with all of who I am.

Do I have questions?

Well, yes. Conflicts, even, some days.

For now, though, I’m appreciating.

Appreciating what I learned baking bread.

Appreciating how I feel when I choose, in this season, not to eat it.

This is not an “all or nothing” kind of experience.

Instead, it’s something much harder.

An experience of making room for the many things that are true, even when they don’t always go together very well.

Harder, and still more helpful, I think.

Where have you had similar experiences?

What have you learned?

What difference might it make in your world?

I used to bake bread.

Bread is baking me still.

Sue Boardman, Certified Intentional Creativity®
Color of Woman Teacher & Coach